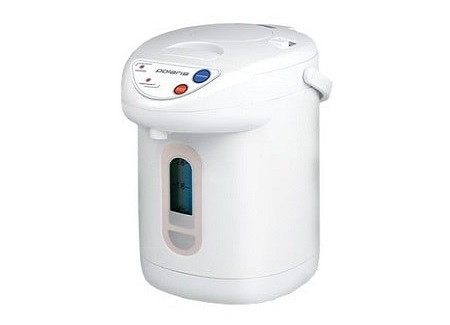
Thermopot is a useful household appliance invented not so long ago. It combines the functions of an electric kettle and a thermos, and in many ways resembles a samovar. On the one hand, it allows you to quickly boil water, on the other - for a long time to maintain its temperature. However, such household appliances require repair from time to time. If you want to carry out repair of a thermal sweat yourself, before you start work, find out as much as possible about how this device is arranged and functions. To do this, just read the instructions that came with the device.

The device and principle of operation of the thermal sweat
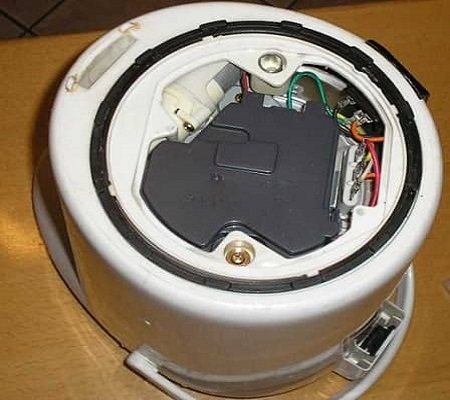
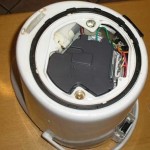
All heating devices are arranged according to one scheme, only their additional functionality and the material from which they are made distinguishes them. The functional elements of the device are placed in a protective case, so in order to fix the thermal sweat yourself, you will need to remove the case. The liquid is poured into the tank from a stainless steel, into the bottom of which two heating elements are integrated - TEN. The first one heats the liquid to boiling water, and the other heater is needed to maintain the temperature. All cables are equipped with a ceramic sheath, which prevents the cables from contacting the steel tank.
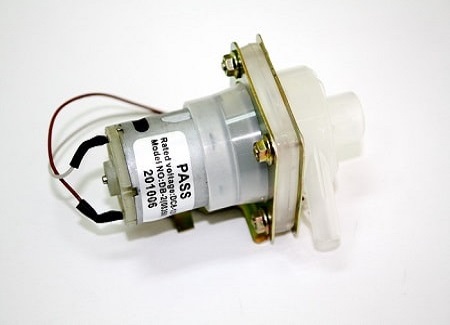
In the lateral part there is a tubular object (water pump). This pump is needed to supply water. In various versions, the voltage drop across the motor is in the range of 8-24 V.
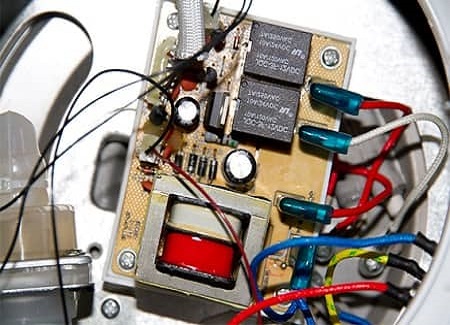
It is worth noting the electric board on which the circuit is installed, necessary for secondary boiling. In addition, it is necessary for voltage conversion. Broken contacts on this board can be repaired by yourself, just using a soldering tool.
In addition to this main board, the device also has a control module. It supports the functioning of the water supply and secondary heating keys. Also, indicators are connected to the module, showing which of the available modes the equipment is currently working on.
In a heating device, the thermostat is of great importance. It is mounted in the bottom or side of the water tank. For situations when the thermostat for some reason does not work, a thermal fuse was created. It eliminates the possibility of overheating and breakage of the thermal sweat when it is accidentally activated with an empty tank.
Having found out where all the key elements of the thermal sweat are located, it becomes much easier to establish the cause of the breakdown and make the thermal sweat repair yourself. But it will be more correct to investigate the circuit, to understand all the connections and what parts should be replaced.In some cases, repair is impractical, and even specialists do not undertake it.
Tip:
Read also: DIY blender repair: fixing damage
Frequent thermal breakdowns
Consider the most common problems and their solutions.
- The indicator panel does not light up and the device does not function at all. In such a situation, it is necessary to inspect all the wires and the joints, as well as the thermostat and the fuse. If more than one breakdown, it will be more difficult to repair the device with your own hands.
- Only the secondary boiling key functions, but the main primary boiling is not performed. In this situation, check the thermal switch located at the bottom.
- The main boiling function, but with a secondary boil, the thermal stream does not work. It is necessary to examine the module on the main board.
- Boiling does not work, only heating is available. Most likely, the heating component burned out, or the wire broke.
- The water supply does not work. There are irregularities in the pump. Often, in this case, the spiral element for auxiliary heating burns out, after which voltage is not applied to the engine.
![]() See also - How to repair an electric kettle yourself
See also - How to repair an electric kettle yourself
Faulty thermal cable
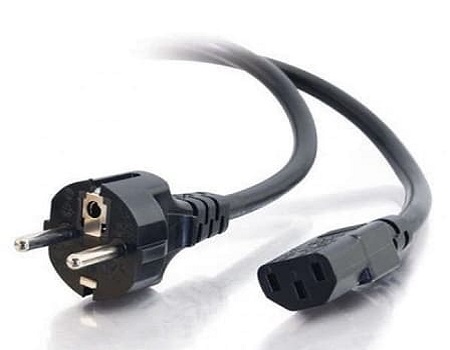
The body of the equipment is fixed with screws that need to be unscrewed by removing the plug from the socket in advance. In the inside you will find a bar that you need to carefully inspect. All kinds of burnt components, no doubt, indicate the specific location of the malfunction. The cord is carefully separated from the device and checked by a tester. If the cause of the cable malfunction, you can quickly replace it with your own hands.
Microchips
There are two electronic modules in the standard thermal flow:
- For power supply.
- For management.
Both need to be visually inspected for any swollen capacitors, blown resistors, unsuitable fuses, or torn tracks. Replace damaged elements with new ones, contacts and soldering are restored by tinning.
But first of all, it is necessary to check the presence of fuses and their integrity. If changing the component does not help, but instead the replaced part also burns out, it means that the malfunction lies in the electronics, which failed due to a short circuit.
The value of the resistors is indicated by multi-colored stripes. The standard question is how to find out which side the marking begins and which ends.
With capacitors it is much easier - they swell. As a rule, beginners who are looking for methods to fix the thermal sweat are tormented by the question - what does it mean “swell”? To understand, it’s enough to see at least once the idle capacitor.
With diodes it is always more problematic, however, and they break much less frequently. You just need to separate the component and test it with a tester from both ends to find out if it works.
Torn tracks of the electronic circuit should be slightly cleaned, removing the coating layer from them. Then the surface is tinned and covered with solder. It will work as well as before.
Tip:
Read also: DIY sewing machine repair
The pump does not work
The pump pumps water for supply through the tap in manual or automatic mode. The pump is arranged quite simply, it includes several simple windings, which any beginner can understand. All contacts need to ring in pairs. Also, a pump dismantled from the housing should be tested by directing a certain voltage to it. The 12 Volts needed to test the pump can be obtained from simple batteries or the machine’s battery.
Repair of heating elements of a thermal sweat
We do not recommend changing metal sheets with terminals to others. Overheat protection is provided by bimetallic circuit breakers. The durability of the device largely depends on the functioning of this element.As a rule, there are more than one thermal switches in the heater; moreover, one of them monitors the characteristics of the liquid, and the second does not allow activation when the tank is empty. In such a situation, the TEN component is heated to a temperature of more than one hundred degrees and breaks the power supply circuit.
To improve the contact of the TEN switches, they use a special paste similar to that applied between the fan and the PC processor.
This sensitive component functions quite simply. When the surrounding space warms up to the set temperature, the contacts of the TEN switch open. But once the temperature drops by 15-30 degrees from this point, the conductivity resumes. Unfortunately, it is impossible to figure out what kind of these elements of the heating elements belong to, simply by looking at the instructions for the thermal sweat. However, the surfaces of the elements are always marked, so you can choose the optimal replacement.
Tip:
Read also: DIY coffee machine repair
As a rule, the manufacturer is not satisfied with a simple overheat protection system and equips the equipment with fuses. These are small tubular elements that are closely pressed to the wall of the tank or glued to it. When the steel tank heats up to a critical temperature, the heater fuse blows and the device will not work if it is not replaced. That is why the technique should be carefully examined for the presence of such defects.
Also, with the help of a tester, the operability of the bimetallic contact is checked. Before starting the test, the heater element should be unsoldered.
When the spirals of the heating components burn, it is simply unprofitable to repair the equipment. The tank is too complicated to disassemble on its own, and insulation and cables are quite expensive.
After completion of repair work, the safety of the device should be tested. To this end, the resistance between the plug and the reservoir, and between the plug and the outer casing should be determined. In a normal situation, it must be infinite.
![]() See also - Choosing a thermal sweat for the home
See also - Choosing a thermal sweat for the home
Wah!
Potter Toshiba (Japan) malfunction - when turned on, everything works, but does not turn off, it constantly boils.