The cuff for the washing machine is used as a seal for the loading door. Its task is to prevent leakage of the hatch during machine operation. Therefore, its importance is difficult to overestimate. Even small metal objects (coins, bra bones, etc.) or metal objects on clothes that got into the inside of the machine during washing can damage the rubber on the washing machine. How to replace the rubber seal of the hatch with your own hands?
Consider the possible causes of the malfunction
- wear of the hatch of the hatch from a long service life;
- cuff damaged by fungus;
- rubber breakdown caused by harsh chemicals;
- the cuffs are wiped inside;
- cuffs are erased thanks to large solid things (caps, shoes, etc.);
- Also, the cuffs become defective as a result of inaccurate packing or unloading of clothing.
![]() See also - Why doesn't the washing machine heat water?
See also - Why doesn't the washing machine heat water?
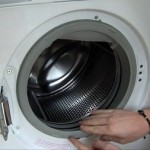
How to dismantle the first clamp
To repair or remove the rubber from the drum of the washing machine, you must first remove the clamp holding the cuffs along the curved curved side. As a rule, for each washing machine, either a spring or plastic collar is visible on the side of the rubber band. For the correct removal of the plastic clamp, it should be pulled over in the area where the locks are located. If the clamp is made in the form of a spring, it is necessary to unscrew the retaining screw or simply pull the spring onto itself, prying it with a screwdriver. After the clamp has been removed, the cuffs sealing the hatch can be removed without hindrance.

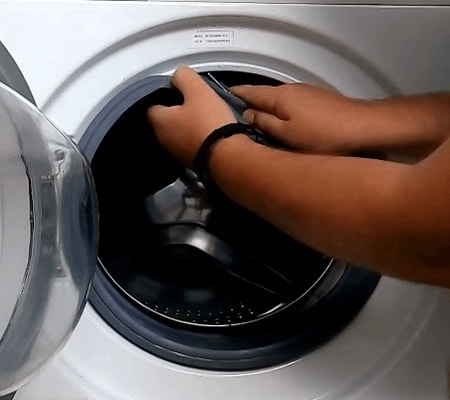
Dismantling the inner (second) clamp
Before you remove the second clamp of the washing machine, you must carefully inspect the cuffs for tags for installation. Thanks to this mark, the cuffs are placed in a strict position with respect to the tank. This ensures tight closing of the hatch and competent drainage of water. In the event that it was not possible to find the mark, it should be noted on the elastic band its location in relation to the tank. Such a trifle will be important when a new cuff for the washing machine is installed. Then, the grooves freed from worn gum need to be cleaned thoroughly from accumulated contaminants and thoroughly lubricated with a soap solution. When the grooves are slippery, it will be easier to replace the cuffs with a new one.
Installation of new sealing rubber
Carefully replacing the rubber seal of the hatch is a responsible matter, the health of the further operation of the washing machine will depend on this. Especially if the repair is done by yourself.To change the old rubber to a new one, you need to match the cuff and tank label. Then, into the grooves smeared with soap, insert the curved side of the cuff. To do this, you need to take the rubber on the inside and gently push it with your fingers on the rim of the tank. But, when the main part of the rubber is already worn, the further insertion of the cuff will be difficult, as the worn side will begin to slide.
The still-undressed area of the cuff should be worn on the tank ring, running the thumbs towards each other. When it was possible to completely replace the rubber, you should finally test the entire rim of the tank to be sure of the tightness of the fit. The entire repair of the washing machine should be carried out very carefully, avoiding the use of sharp objects so that the new rubber does not tear.
Installation of an internal collar
The internal clamp of the washing machine has a screw for adjustment, during installation it should be turned to the required diameter, we install the clamp in place and squeeze it with a screw. If the spring type clamp, replacing the cuffs will be a little more difficult, but also feasible. You will need to firmly hold the first tension point of the clamp. To hold the spring clip of the washing machine, you need a screwdriver. It should be driven into the channel that fixes the hatch to the stop. After that, the spring is drawn with a screwdriver around the entire rim of the tank, laying it in the grooves.

Having put on most of the spring, the difficulty again appears in holding the clamp, since the tension angle has changed. To replace the spring clamp on old machines, pliers are used, because such springs were made without an adjusting screw.
Securing the first clamp
If you managed to cope with the internal clamp, the external can be installed without much effort. To install clamps that do not contain spring or screw tension, curved round pliers are required. With their help, you need to open the tightening hooks and install the clamp.

Check
When it was possible to replace the sealing gum of the hatch and install the clamps, the repair should be checked for quality. Having set the rinse, start the device, wait two or three minutes, let the water go. When the water came down, we tilt the machine in the opposite direction, and inspect the bottom of the rubber. If there are no streaks, then the repair was successful.
See also: