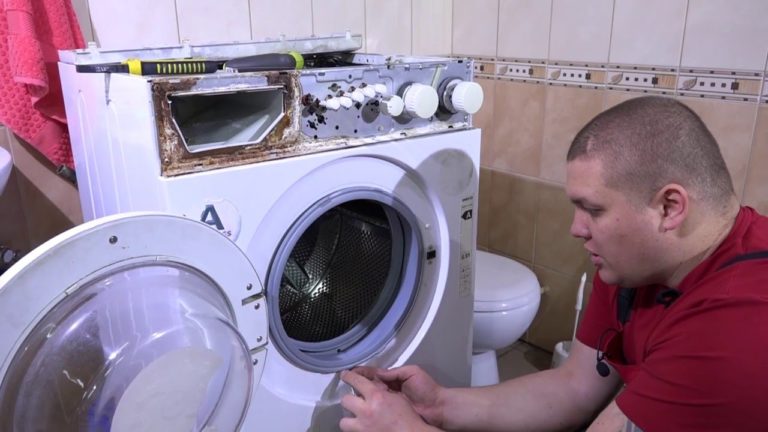
The breakdown of an automatic washing machine for a modern housewife is akin to a typhoon, which brings many troubles. But, fortunately, a faithful knight in the face of her husband, if he has golden hands, can put the spoiled miracle of technology in order, even if such a difficult operation as replacing or repairing a washing machine tank is ahead.
How to disassemble the washing machine tank yourself?
It is quite possible to disassemble the tank with your own hands at home, even if the instructions say that it is a non-separable type.
When repairing a washing machine tank, the main thing at the first stage is to determine where on its body the seam is located, connecting both sides during soldering. The design can be with two bearings or with one, but the conditions of the problem do not change from this, you just have to knock out one more. Step-by-step instructions for disassembling the washing machine:
- Along the entire perimeter of the seam, places are marked where it will be necessary to drill holes in the future - this operation is necessary for fasteners at the end of the work. Their distance should be approximately 5 to 9 cm, but no more so that there are no leaks. The diameter of the holes in the tank of the washing machine should not exceed 3 - 5 mm. As a result, you get about 20 marks. Now you need an electric drill and a drill - three millimeters, in order to drill the marked holes.
- Then you need to cut the tank clearly along the seam. This stage of repairing a washing machine is one of the longest and most critical moments, which will require accuracy and patience. The whole difficulty is not to damage other parts of the tank of the machine with a hacksaw.
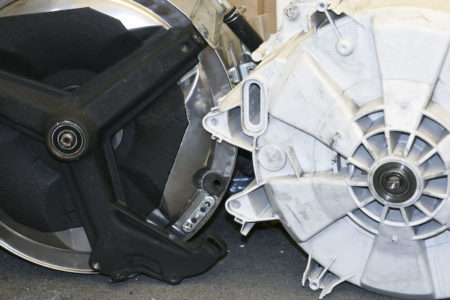
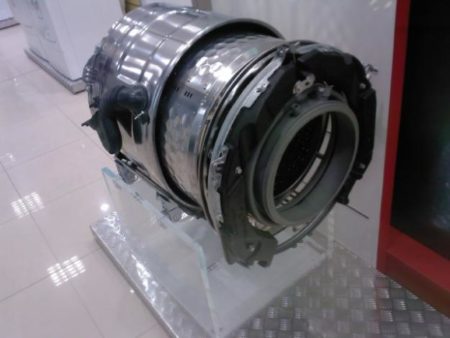
- After the welding seam is dismantled, the washing machine tank will be divided into two parts - front and back. They are most often made of plastic material. These parts differ from each other. The front is a kind of ring, but a slightly distorted shape, and in the middle it has a hatch and a rubber cuff. The rear half consists of a drum, as well as a drive mechanism, a bearing, a wheel for a variable transmission pulley.
- Now finding the cause of the breakdown and making the necessary repairs is not so difficult. The rear half should be turned over so that it is the drum hatch downwards. It is more convenient for further work to put it on bars or other convenient device. In general, it is not difficult to disassemble the shaft, but you need to be able not to damage the screw, which is located in the middle - this is the main fastener.In order for the screw to be free to unscrew, you need a rod, preferably metal. Professional craftsmen advise using a center punch for these needs. It is enough to direct the rod to the screw, and then hit it with a hammer. Usually a few times is enough. Now, using a Phillips screwdriver, the screw can be removed without problems.
- The shaft must be removed from the stem in accordance with all the rules of plumbing. Before performing this operation and carrying out repairs, you need to stock up on wooden blocks of different sizes. Large ones - useful as a support under the edges of the tank, giving it stability. A small block is required to direct it onto the stem and hit with a hammer several times. First you need to hit lightly, then a little harder, then even harder, this will lead to the fact that the drum will separate from the body.
![]() See also - How to remove a drum on a washing machine: step by step instructions
See also - How to remove a drum on a washing machine: step by step instructions
Dismantling and installing bearings
Before removing the bearings, which are located in the casing of the washing machine tank, you must make sure that they are broken. If, after inspection, it turns out that they are in working order, they do not need to be removed. In the event that, after inspection of the bearings, deformation is found, the problem is in the oil seals, as well as other malfunctions, they must be replaced.
You will also need a metal bar to remove the bearings of the washing machine. It needs to be positioned on the edge of the part, and applied a few gentle blows with a hammer. Moving the rod to the other side - the blows are repeated. You should hit the diameter, but not on one side, otherwise the bearing will jam, and there will be a problem how to pull it out. If it is skewed, then you can drill it with a stepped drill. Then, in place of the old ones, new ones are installed. This completes the repair of failed bearings.
![]() See also - Do-it-yourself washing machine repair: expert advice, step-by-step instructions
See also - Do-it-yourself washing machine repair: expert advice, step-by-step instructions
What to do if the washing machine tank is leaking
If the tank itself is damaged, or rather, its walls are deformed, the first step is to assess the degree of damage. Usually the plastic part suffers the most. It often cracks, and the water entering it begins to seep. When repairing such tanks, it is better not to seal the cracks (since this is short-lived), but to completely change the entire part. Moreover, the plastic version is not so expensive.
Another thing is with tanks made of stainless steel. If this begins to leak, then the problem area can be welded - in this case, the machine will serve for a long time. In this case, it is better to entrust the repair to a professional welder. After the weld seam, it is necessary to cover with a special waterproof enamel. This will help increase the life of the element, and the washing machine as a whole.
There are no other methods of repairing damaged tanks yet. Only a complete replacement of a worn-out tank or full welding can save you.
![]() See also - Grinding sound in the washing machine when spinning and spinning
See also - Grinding sound in the washing machine when spinning and spinning
Is it possible to repair deformed tank walls
If the tank is bent, it can also be repaired by hand, but only if the defect is small and the tank is free of holes. Required repair tools: a hammer and a small piece of wood.
The place where the dent is located must be heated from the outside. The bar must be positioned in the place that corresponds to the internal defect, and while the surface is warm, gently tap with a hammer until the dent is straightened.
Other possible malfunctions and their repair
Now you need to check the operation of the drain valve and the drain hole of the tank, since blockages often form in them and small but annoying breakdowns occur.
The drain hole must be cleaned of debris and dirt. It is better to use sandpaper for this. It often turns out that the sealing rubber has become unusable or the cuff of the drain valve is worn out.This is immediately noticeable: the rubber has lost its elasticity, has become inflexible, and cracked.
Assembling a refurbished tank
After all the failed parts have been repaired, the tank is assembled - in the reverse order from how it was disassembled. Having reached the procedure for joining the edges of the sawn element, you should coat it with a sealant or use cold welding. When the edges are connected, then through the holes made earlier, it is required to install the bolts and secure them with nuts. The diameter of the bolts must match the diameter of the drill.
If the malfunction of the washing machine is not very serious, you can disassemble the tank and make repairs yourself at home. But if the breakdown is very significant, it is better to hand the washing machine into the hands of a professional technician by contacting a service center.
See also:
- 7 best LG washing machines
- 7 best Gorenje washing machines according to customer reviews
- 7 best washing machines before according to customer reviews
- 8 best narrow washing machines according to buyers
- 8 best BEKO washing machines according to customer reviews