Need a humidifier, but don’t know which one to buy? There is an exit! Turn your wit, pick up the "unnecessary" stuff and act. But first, we recommend reading this article to learn how to make a DIY humidifier. And ... Let's start!

Battery + bottle = formula for optimal indoor climate
The ideal humidity inside a residential (and not only) premises should be 40-70%. Such a microclimate can be provided not only by purchased units, but also by home-made ones. For example, you can make a humidifier with your own hands on an open battery. But there is one condition. The battery should not be "hidden in the wall."
In general, the scheme of operation of this device is quite simple, so you will not have any difficulties in its implementation (at least, it should not). So, for work you will need:
- 1.5-2 liter plastic bottle;
- wide scotch tape;
- gauze meter;
- the cloth.
![]() See also - The benefits and harms of household air humidifiers
See also - The benefits and harms of household air humidifiers
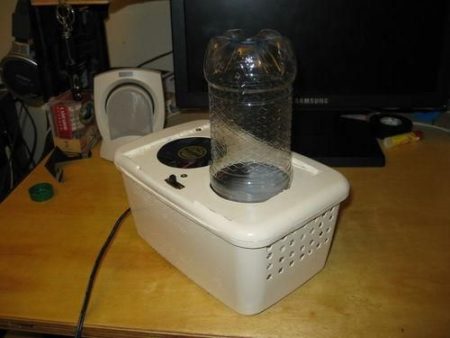
Humidifier from a plastic bottle
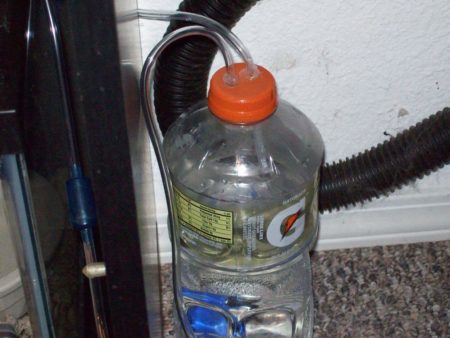
A humidifier from a plastic bottle is made quickly, and the effect you get is exactly the same as from a store.
- Hold the container horizontally. On the side we cut a 12x7 cm rectangle, where twelve is long and seven is width.
- Now you need to attach the structure to the pipe (you can do this using fabric pieces or a rope), which comes off the battery. The hole you cut should be right under the pipe. To prevent your humidifier from turning over, glue the places where the fabric touches the bottle with tape.
- We put gauze “sausage” one meter long and ten centimeters wide.
- We lower one end of the “gauze sausage” into the window you cut, and the second we wind the pipe on which this whole structure is located. To enhance the effect, you can make several of these gauze "sausages".
- Fill the unit with water to start the unit.
![]() See also - DIY Care and Cleaning the Humidifier
See also - DIY Care and Cleaning the Humidifier
Homemade humidifier from scrap materials

Making a homemade humidifier is much easier than it seems at first glance. For example, you can take nice small ceramic vases, pour water into them and attach them to the accordion of a heating device. Both beautiful and beneficial for the microclimate, and, therefore, for health.
But it may happen that you are "overwhelmed" by laziness or the mood for searching "all sorts of vases" simply will not be. And there is a way out! Just hang a metal can on the battery. Pour water into it and that's it. You can use two cans too! While one goes through the cleaning process, the second works. But this unit does not last forever.As soon as the heat is turned off, you have to say goodbye to him.
Bucket and expanded clay - the key to a healthy microclimate
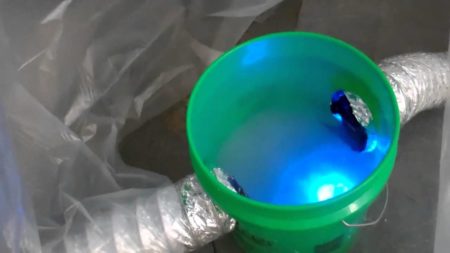
How to make the unit itself, which will provide air humidification? Yes, as easy as shelling pears! If you have a bucket and expanded clay, you can create your own moisturizer, which not only gives away, but also absorbs moisture.
You will need:
- Four buckets "mesh" (something like those used in offices for waste). Two large, two a little smaller (we are talking about size);
- a bucket of twelve liters (ideal);
- aquarium pump;
- computer 14-centimeter cooler;
- high temperature building hair dryer;
- stretch made of plastic.
Well, now let's get started.
- We glue together the smallest buckets. This can be done either with a household hair dryer or with fasteners.
- Now you need to do the same with large buckets, after placing there already glued small buckets.
- Next, cut a hole in the structure and make a lid. We fall asleep expanded clay. The material should be of such a size that it does not spill out of the mesh bucket. Are you done?
- Well, now we take a 12-liter bucket. Place the aquarium pump on its bottom and extend its tubes to the top of the mesh bucket structure. Well, now install the plastic ring with holes.
- We got to the most difficult part of the job - installing the cooler. That he will be the "body" that will make expanded clay "stir" and moisturize the space. Here you will need the same ingenuity and adhesive tape.
![]() See also - How to choose the best air dryer for the home
See also - How to choose the best air dryer for the home
Important:
For this type of humidifier, it is important that the expanded clay is of high quality. Before you fill it into the device, be sure to rinse it under running water.
Plastic again
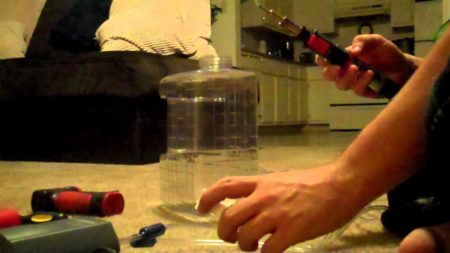
Already something, and everyone has enough plastic on the farm. Therefore, consider another example of a homemade humidifier with your own hands. So, this time we will talk about a device that will give us the effect of cold steam.
You will need:
- plastic ten liter bottle:
- wide adhesive tape;
- computer cooler.
- Cut off the neck in the bottle so that the cooler fits there.
- Now we attach the cooler to the neck. Or tape with tape. Or make fasteners.
- Plug in the cooler.
That's all. As you can see, there is nothing complicated. As they say, cheap and cheerful J.
And some more plastic
Well, since we have already taken, we need to develop the production of "creative" moisturizers in full. Now we suggest using plastic trays for storing food. Such a “refreshing” unit is a little more complicated in design, but much more effective than the previous one.
You will need:
- a large plastic box of 30 liters so;
- smaller tray, always mesh;
- gauze;
- fishing line / wire;
- fan.
Have you prepared? And now let's go tinkering!
- Fasten the wire / fishing line to the mesh tray so that it is stretched.
- We hang gauze on the fishing line so that it reaches the bottom of the tray. By the way, instead of gauze, you can take a bandage.
- Pour water into a large tray and put our design into it so that the ends of the gauze get wet.
- Now we cut a hole with the diameter of a fan in the lid of a large vessel and place a “wind generator” in it.
- Put on the cover on the resulting structure and plug in the fan.
Congratulations! You have just built a versatile humidifier with your own hands. Such a homemade unit works quietly. Therefore, you will not feel any discomfort. Water consumption averages one and a half liters in six hours. You will spend about 6 liters a day. And this is under the conditions of continuous operation. Agree, it’s quite an economical thing.
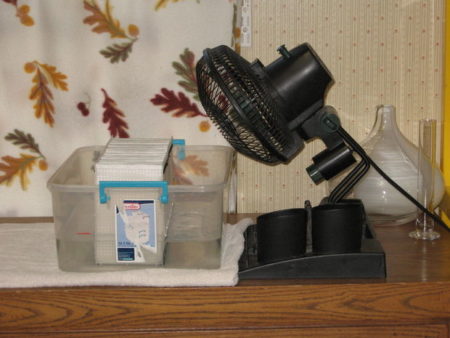
Floor fan turns
This method is designed for those who are just too lazy to do something: go to the store for a humidifier, spend time searching for it on the Internet, and even more so make it yourself. But you want fresh air! There is an exit!
- To get started, find a rug at home.
- Wet it (do not forget to squeeze).
- Take a floor fan.
- Attach this wet mat to the pipe (position it slightly above the height of your floor tornado).
- Hang what you've got above your fan.
- Turn on the fan.
Done! Now the microclimate in your room will be within normal limits. But remember to wet the rug periodically. And yes, then you (the mat) will most likely have to be sent to a garbage container. It is unlikely that he will withstand such a "pressure" of salt and rust.
Instead of an epilogue
Of course, to list all the ways to create unique moisturizers is simply impossible, so we are contacting you, dear readers. If you can think of something even more original on the topic "how to make a humidifier with your own hands", be sure to share your "recipes" for a healthy climate in the comments. Look forward to!
Well, that's about it, perhaps! See you soon!
See also:
- 8 best Electrolux humidifiers and air purifiers
- 9 best VITEK humidifiers and purifiers according to customer reviews
- 10 best humidifiers before customer reviews
- Top 10 Royal Clima Humidifiers and Purifiers according to customer reviews
- 10 best AIC humidifiers and air purifiers