- What to do if there is no instruction
- The most basic steps for refueling a sewing machine
- We are looking for the right parts for a sewing machine
- Step-by-step setup and refueling guide
- Practice making stitches
- What tools should always be in the arsenal
- Proper operation and maintenance of the machine
- How often to lubricate the machine and how
- Conclusion
Finding out how to use a sewing machine is actually the easiest! Much harder to learn to sew. But, let's not drive horses and start with the basics.
Modern cars, and not modern, by the way, are arranged almost identically. Even those rare Singer, which was used long before your birth, have almost the same device. And if, you understand how to use any one, the rest of the modifications you will not be so puzzled and put into a stupor.
What to do if there is no instruction
Of course, it would be better if it was, but often the opposite situation occurs when the machine is bought from hand or inherited. Then, before refueling it, you need to try to find a detailed description of the process specifically for this model on the Internet.
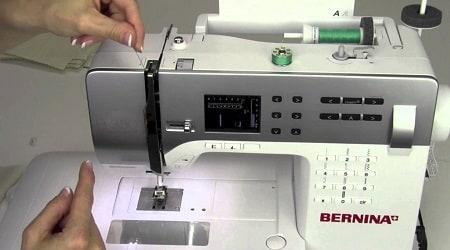
But we, nevertheless, will give a universal process of threading and starting the machine, using the example of a conventional electric model. By and large, they differ only inside, and on the top and on the side panels look the same. Moreover, all modern cars are equipped with small, clear pictures above each button or lever. Therefore, we must try very hard so as not to understand at all how to exploit it.
The most basic steps for refueling a sewing machine
When you get the hang of it, this process will take three minutes of your strength. In the meantime, remember exactly what actions will need to be performed before sewing starts:
- Set the needle and fasten it
- Install the upper thread spool
- Use it to wind the lower reel
- Thread the machine from above with thread and bring it to the lower bobbin
- Plug the mechanism into a power outlet and press the "Start" button
Of course, this procedure does not tell you anything yet, but it will come in handy to you after you read the second and third blocks. You can look at it and check it, it’s convenient.
Now let's go step by step.
We are looking for the right parts for a sewing machine
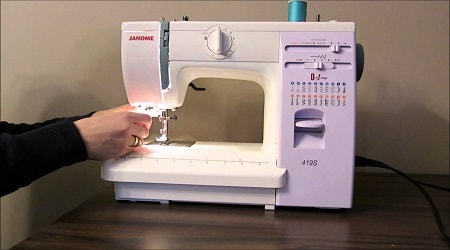
- Power button.As a rule, it is located on the right side of the sewing machine, since all the machines are designed for those for whom the right hand is the main one, in a word, on the right-handed person.
- Upper reel seat.This is the most common pin, which is located on the case, on top. A coil is put on it, nothing complicated.
- Thread guide.It is located on the needle holder (what it is, understandably and without explanation, I hope). The thread guide guides the upper thread to the bobbin (lower bobbin of thread, which is wound with the main bobbin on top). It looks like a small metal plate.
- Pin for reel-winder.Located next to the reel seat, it also has the shape of a pin, but smaller. A reel is placed on it. A thread is wound around it, and then it is placed in a bobbin and placed inside the machine, down. That is, this is the bottom coil, but it is refueled from the top, before getting into its place.
- Stitch adjusting buttons.Usually, they are in the most prominent place of the body. Looks like sliders or round rotary knobs. They have patterns with types of stitches, so it is almost impossible to lose sight of them. With these buttons you can adjust not only the stitch length, but also the direction (forward-backward).
- Thread take-up.It is always located on the left front of the case. The thread is threaded into it after it has been passed through the thread guide. It looks like a lever.
- Thread tension regulator.It is located on the foot, in the form of a wheel or a twisting lever on the thread. It adjusts the thread tension. If it is set incorrectly, then the bottom of the sewing line will be with loops, and not smooth. In general, the seam will not be tight, but loose.
- Needle holder with screw.A needle is inserted into it, by loosening it slightly, and then, after the needle is inserted, the screw is tightly pulled. It is always located on the right side of the needle holder, and it is not so miniature as not to be noticed.
- Foot.The foot is the foot because it looks like it. I am sure you will not confuse it with anything else. But, just in case, this is a part located under the needle holder and visually similar to small skis. It is needed in order to fix and hold the canvas while sewing.
- Lever for lowering the presser foot.When you start sewing, you lower this lever and the presser foot presses the fabric. When you're done, pick it up and pull out the product.
- Needle plate.This is a metal plate right under the needle, with a hole for it to enter.
- Fabric conveyor.These are the teeth that are on the stitch plate. With their help, matter moves in the direction you need. If you press the stitch forward - it moves in one direction, if you switch to the reverse, then the teeth move the fabric in the opposite direction. It always has two rows.
- Bobbin and lever.Always located under the throat plate. This is a box in which a flat bobbin with a thread (bottom) is placed, which is wound by putting on the pin of a bobbin-winder. There is also a lever with which the bobbin is inserted and removed.
Step by step guide to set up and refuel

And now that you’ve got acquainted with the main details, let's thread the machine and prepare it for work.
- Place the machine in a convenient, stable place. She should stand in such a way that the needle is on the left side.
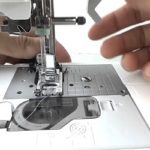
- Insert the needle using the flat side. At the top of all needles there is such a place and it coincides with the groove on the needle holder itself. Look at which side it is located (either at the back or the side) and insert the needle accordingly. Tighten the screw so that it does not hang.
- Place the spool up on the spool seat (large pin).
- Take the bobbin out of the bobbin and place it on the short pin.
- From the main spool, pull the thread through the thread take-up and onto the bobbin, start the thread winding mechanism. Everything is clearly drawn there and difficulties should not arise.
- Remove the spool of thread and place it in the bobbin case, secure it under the needle plate. Make sure that the tip sticks out of the bobbin, about 5-7 cm, we will need it later.
- Thread from the main spool. It is very easy to do this, simply by following the signs on the sewing machine, arrows and drawings.If they have been erased from you or you still don’t understand anything, then usually the filling process is as follows: left to the side of the needle - down - up - again down - to the special lever (thread guide) - to the needle.
- Insert the thread into the needle, focusing on the side from which it was originally fed, that is, without twisting or wrapping the needle. Maybe this is an absurd clarification, but there are also such errors
- Pull both threads out from under the presser foot, and point them back behind the presser foot on the needle plate. For your convenience, you can pry them off with something, for example, scissors.
- Connect the pedal to the typewriter
- Plug in
Practice making stitches
Now you need a large flap of fabric. Cut it into many small ones and stuff your hand.
First you need to set the simplest line mode - direct. Sew until you feel that the “typewriter” is listening to you.
Then learn to make turns, scribble with an angle, that is, rotate so that there remains an acute angle, then scribble near the edge, trying to get one seam width.
Adjust the thread tension, depending on the thickness of the fabric. Nothing can be advised here, it comes only with practice and empirically.
After you manage to deftly manage with a straight seam, try other types of stitches (zigzag, stitching and curly)
What tools should always be in the arsenal
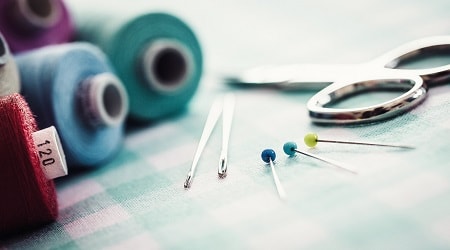
If you want to sew, then you always need to have these main things:
- Accessory box
- Cutting scissors
- Thread cutting scissors (small)
- Chalk or remnant
- Centimeter
- Ruler
- Pins with caps and a pad for them
- English pins set
- Ripper
- Set of interchangeable needles
- Spare bobbin
- Machine lubrication oil
- Dust sweep brush
Of course, this is the most basic set. In the process of practice, you will understand that you are still lacking and buy it.
Proper operation and maintenance of the machine
Cars, in general, are not a very moody technique. But, the more functional it is, the more expensive it is to breakdown, since everything is tied not to ordinary mechanics, which will tolerate any errors, but to electronic boards. And, if you constantly get confused and press the wrong buttons, it can “turn off”. Therefore, be careful.
In addition, always clean the machine of the remnants of fabric dust and small threads.
If you do not use the machine for a long time, then store it in a box in a dry place. Moisture will rust and spoil internal parts.
No need to try to sew the fabric that the machine does not “take”, this can lead to breakage. Usually, in modern models, various modes are provided, from silk to leather. Therefore, you should not try to scribble dense fabric on the silk mode.
How often to lubricate the machine and how
To lubricate the machine in it there are special, small holes. Bury oil in them, at least once every six months, or even more often, if you notice that it began to make noise during work more than usual.
Choose a good oil, preferably from the same company as the machine itself. But, pay attention to the fact that not all models need such a procedure. Some modern cars do not provide lubrication at all and it will only harm them!
Therefore, before deciding to take such a step, check the information on the Internet about your car.
Safety measures for working with a sewing machine
The most important rule - do not put your fingers under the paw! It can be very painful and creepy, especially when the needle at full speed completely penetrates the fingertip and nail. Brrr ... Be careful, this is still a technique.
Conclusion
We hope that our explanation has been detailed and useful to you. This is a universal guide that you can use both conventional models and mini-sewing machines.
But again, we remind you that the guide on how to use the sewing machine is just the first step at the beginning of a long journey.